Tuesday, December 28, 2021

Notion for Authors


Hopefully, you’ve had a chance to play with Notion and all its lovely options. Let’s talk about how the app can make life easier for authors.

The focus of the program is project management. Here is a place to manage your writing career. The Goals template is a great place to start. You can convert it to an extended to-do list for current and future projects. The template has spaces for upcoming, ongoing, and future tasks. Create goals for the year or map out the due dates for projects. The Roadmap template works similarly, giving a great visual of the progress of a project.

I find writing things down helps so much. It might seem redundant or lame to spell out goals or steps. But life is busy, and people forget things. (Like I opened my Goals page and was happily surprised I’d already spelled out my intentions for 2022. I totally didn’t forget I made that list.)

Another useful template is Calendar Content. With this page, you could map out social media posts, planned discount sales, and in-person events (if we ever get there again). A great author class I attended suggested using a calendar such as this one to plan social media content. At the beginning of the month, take a few minutes to jot down your intended marketing items. It will save time in the long run. You can save the images and ad copy for the posts right in Notion. Cut, paste, and you’re done!

One interesting template in the Marketing section is called Brand Assessment. In this template, you can save your logo, banners, ad copy, fonts, avatars, and more. Currently, I’ve been using Google Keep for my collection of hashtags, links for my books, and plot bunnies. By employing Notion for the task instead, I can also add my book covers and ad images. All my social media links, pictures, and marketing material will be in the same place. Then Keep will be just for my plot bunnies and checklists. Perfect!

Another great template in the Marketing folder is the Mood Board. I create a similar board on Pinterest and keep it public. But perhaps as you are plotting (or pantsing), you want to keep your cards close to your chest. The mood board allows you to add pictures, website clips, and videos to visualize your book. Once you’re ready, you can add the content to other social media (or not, as you prefer).

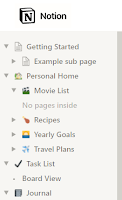
Templates are not the only option for making Notion work for you. Once you become familiar with the app, you can create timelines, databases, name lists, story/series bibles. The sky is the limit.

Notion is diverse enough to handle many author tasks. (It even has an add-on $50 template for making newsletters!) As the program is available on Android and iOS, you can update Notion on the go.

I want to thank all my readers for another great year. Next week, we’ll have a wrap-up and then forward to new apps for 2022.


Tuesday, December 21, 2021

Notion Templates


Now that you’ve wet your feet with Notion, let’s look at all the built-in options available.

Notion starts you off with some pre-made pages to show choices in the app. The first is Getting Started. On this page, there are basic instructions on how to use the app and some tips and tricks. It also has several instructional videos and a link to fifty more on YouTube. If you plan to embrace this app, I’d advise you to watch them.

Next is a Personal Home page. This spot has some ideas for organizing your tasks, data, and other life items. The purpose of this page is not only to put your ducks in a row but to show how to use sub-pages to keep things neat and crisp with four sub-pages. Next, the movie page has two checklists side by side. The recipe page has the start of a simple database. It illustrates a simple way to get started with databases embedded in the page. Yearly Goals has simple lists which we already covered. Last is Travel Plans, again with a simple database you can customize to your own needs.

The Task page is a super checklist. The page is in Board View to see all the cards (task lists) at once. It has four checklists across the page with titles. As authors, we juggle many tasks at once. The setup on this page shows what needs to be done and what is being finished. You can add more lists to the four currently on the page. Or add sub-pages with specifics to each task. You can change up the card sizes and add images, too. Get very fancy by turning it into a database with due dates, partners, and social media queues.

The next template page has a journal with multiple sub-pages. It’s a gallery database. Writing directly on to Notion is easy by adding a card/page and then typing. The daily reflection sub-page has built-in some ideas about what to reflect on and how to organize thoughts. Again, all pages are customizable to make the app work for you.

There are more templates at the bottom, on the left menu. Click Templates and peruse the fabulous list of options. They are divided into several categories, each with multiple templates to choose from. Categories include Design, Student, Engineering, Human Resources, Marketing, Personal, Product Management, Sales, and Support. The Other category has choices for teams and meetings. If the sixty choices here are not working for you, click the link on the bottom of the right menu to browse more templates at Notion’s webpage. Categories there include Reading and Writing, Home and Living, Free Lance, and more.

I know this post is more a “what’s in there” than “how-to.” Here are some things to keep in mind as you explore these templates. You can always convert back to the template. The original will still be available even if you created intricate changes. Either hit Undo or start over, dragging your data with you. You can also convert elements within a page into something else if you change your mind. Say you need to make a checklist a toggled list. Highlight, click on the first element of the pop-up box. The list will say Turn Into and change it back or into something new.

Don’t be afraid to play.

Notion is a fully functional project manager you can customize for writers. Next week, we’ll brainstorm some uses for Notion.


Tuesday, December 14, 2021

How to Use Notion


To begin, create an account with Notion. It’s easy to connect with the app using a Google, email, or Apple account. I suggest starting with the free trial to see if Notion is for you. Once in, tell the app your name and add a password. Be careful if it asks you to join an already created team. Mine threw me in with nine other people with the same email tag.

Yeah, I don’t know them.

Eek.

Start by creating your own board unless your workplace has an invitation for you.

The first screen is busy but easy to navigate. Like Facebook and other apps, menus are on the left, and the workspace is in the middle and right. Notion is an empty planner.

Let’s fill it up.

For now, we’ll skip the templates. There are a ton, and next week, I’ll sort out the best of them. For now, let’s start with a blank page.

On the main screen, on the left, below the list of templates, click Add a Page. This will create a blank canvas for your workspace.

Adding Content

Click on the Title to change it to something useful, like Goals for 2022, Gift List, or Character Names. Before you hit enter, you can add a template right away. Scroll down to choose to add an icon or from the templates menu. There are also database options to pick from right away. For now, I choosing Empty.

Once the page is created, you can type away, creating content, blog posts, etc. But if you type /, the program will give you a list of content to add. It includes tons of lists—toggled, to-do, numbered, bulleted. There are also headings, sub-pages, and tables. But wait, there’s more. Add various types of databases, media, and links to outside content.

Phew.

Let’s make a list for now.

Click on the To-Do list. Like Keep and Evernote, a small box appears. Type and hit enter and receive another checkbox. Hover the mouse over the box, and a hand icon will appear, allowing you to check off the task. Click on the six dots next to the box to drag the list item to another spot on the list. The plus sign to the left of the six dots allows you to add another block under the To-Do item. Perhaps you need to add a comment or a sub-checklist for a complicated task.

Making it Pretty

Now let’s add icons and cover art to your page. Hover the mouse over your title at the top. Three options should appear—Add Icon, Add Cover, Add Comment. Click the Icon option to choose from a variety of emojis. (It might pick one for you, as it did for me the first time. Click on the icon again, and the menu of emojis will appear.) This icon will appear before the page name on the left, allowing a visual to remind you what’s on the page (besides the title, LOL).

Click Add Cover. Notion will again pick a picture for you. Just click Change cover to choose your own picture. There is a small image gallery, an option to upload, a link to an outside image, or use Unsplash—another images gallery. Covers must be wider than 1500 pixels and must be under 5MB. Facebook and Twitter banners are too large. If you are creating your own, keep it thin. You can reposition the cover if your image does not fit.

Now we need some style. The three dots on the top right let you add text style and other page management options, such as copy or open the page in Windows. To change the text within the page (bits, sections, or the entire piece), highlight the text to change. A mini menu, like you might see in Word, pops up with styles, colors, spreadsheet equations, code, and links. You can also change the type of text with the drop-down menu at the start of the pop-up. Mine says To-do (because I made a to-do list). If I click on the down arrow beside To-Do, a list of other types of text appear—other lists, databases, plain text, etc. You can always edit the type of text. The three dots at the end bring you to the management options of delete, copy, etc., but also color. Here you can choose text and text background colors.

Adding to the Page

Adding content to the page is easy by clicking either the plus sign in front of any content block or clicking at the end of the list/block and activating the initial call for the / command. To add sub-pages to your content, mouse over to the left menu. Hover over the title of your page. Three dots and a plus sign appear. The three dots allow you to manage the page. Delete, copy, move using this menu.

The plus sign gives options to quickly add a page inside the first one. It appears as a pop-up. You can create content as before with more options. At the top of the pop-up, you can view the new content as a page or add it as a sub-page. Type as needed and choose your option. If you chose Add to…, it will ask you which main page to add the content to. (Great for non-linear thinkers.)

Basic Management Actions

On the left menu, click and drag any page to move the order of the list. You can add the pre-created content to any of your lists. Be careful though. Moving things can get tricky. If you “lose a page” (as I did), click the search button at the top and type the page’s name. I put my reading list inside a timeline! To move it, I opened the “lost” page, clicked the three dots on the top right, chose Move To, and replaced it in my PopSugar folder. Phew!

This is the tip of the iceberg for Notion. Next week, I will talk about the templates available and more options for page content.

As with any app I share, you are the person using it. Try for yourself and see if it works for you.


Tuesday, December 7, 2021

Notion


Notion is a project managing and note-taking app similar to Trello and AirTable. It can be used for teams as well as for individual use. It’s versatile and flexible to suit both personal and business goals. The open format allows users to customize the app into whatever they need. Think of a planner with all the open pages and stickers you might want or need. But it’s not a blank bullet journal. There are many templates and helpful hints to add the content you need, and want, as well as a few new features you weren’t aware you needed.

Notion is available for Windows, Mac, Android, and iOS. The mobile connects with the desktop for ease of use. Having an app update on the computer from the phone is essential these days.

Pricing starts with a free personal-use account. Users can have up to five guests and unlimited pages and blocks. The next level is Personal Pro, $4 a month annually ($5 if billed monthly) for the additional services of unlimited file uploads and unlimited guests. It also has a thirty-day version history. For $8 a month annually ($10 if billed monthly), you can buy the Team level. Invite your team for free, have admin tools, shared workspaces, and unlimited membership. The last level Enterprise is customized to your needs but includes SAML SSO, user provisioning (SCIM), advanced security & controls, and a dedicated success manager. Contact their sales personnel for customization and pricing for this level.

As I explore the new app, I find it much less complex than Airtable and more customizable than Trello. I might have a new project manager for my books here.

Next week, we will dive into how to use the app. By the looks of the bells and whistles in Notion, we’ll need a Week 2 How-To as well.


Tuesday, November 30, 2021

Updates—Keep, Instagram, Verve


Technology is always moving forward. This blog is only two years old, and I have updates on apps I featured earlier. Here’s a small rundown of the great new features.

Google Keep

Honestly, I don’t know if this is new, but I just discovered it. You can switch accounts within the Keep app on mobile. I have a Ginny Google account and one under my real name. I keep all my hashtags and author links under Ginny’s Keep. But, sometimes, when I’m out and about, I need to tweet. Keep allows me to switch Google accounts and can get at Ginny’s lists on my phone!

Also, another feature that seems new is the shopping list. If you use checkboxes to your list, Keep will suggest grocery items to add with a little shopping cart next to the item. This can make adding food and household items super-fast. If you use Keep frequently for groceries, your lists can stay on Keep or be archived to be used again and again.

Instagram

A huge update has happened for Instagram for desktop. There are new buttons! No longer will you need to use the weird go-around I mentioned to post on the site. Now Instagram has the full button menu at the top of the screen, including Add a Post. You can drop in pics from your folders and post in a snap. Phew. No more toggling advanced buttons or having weird code on the screen. We still can’t add posts to stories yet, but the desktop looks more like the mobile. You still may need to refresh the page to get new content. In a pinch, you can still use my old method when Insta claims it can’t post your pic.

Verve Romance

Book+Main has changed its name to Verve. It’s still dedicated to romance novels and book promotion, but with a whole new look. They are still using their “bite” system to promote books. They now also have products for sale, including box sets of books and reader products to enjoy those books (candles, tea, etc.). You can sign up to be a VIP and receive information about deals on products sooner. The site still has “bits” of romance novels to entice you to read. And as an author, you can still add your bites by contacting their contributor email under the Contact Us link.

I’m sure this won’t be my last “Update” post as we move forward. Feel free to contact me at ginnyfrost@ginnyfrost.com to let me know of any updates you’ve discovered. I’ll share them on the blog.

Thanks for reading!

 For more from Ginny, click here!